What Changes Once You Can Read the Chart
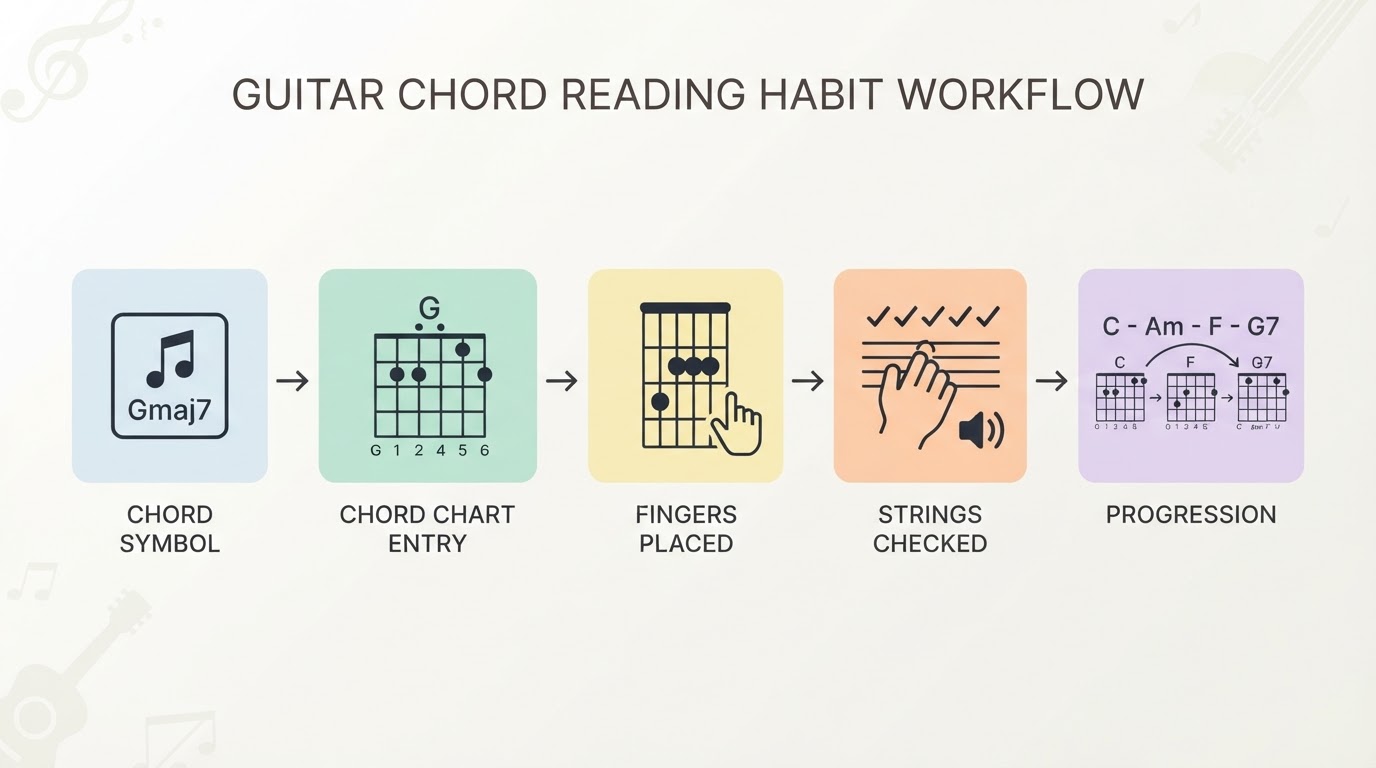
You are done learning to read a chart when a chord symbol stops looking like a puzzle. Someone can write C, Am7 or F#m on a napkin and you can find the entry, put your fingers where it says, hear whether the result is right, and keep playing. The whole job runs in one direction: symbol, entry, fingers, sound check, next chord. Every stage has a visible pass or fail, so you always know whether an entry is finished or still needs work. A string that thuds or buzzes means the entry is not done, no matter how quickly your fingers found the dots.
Six Steps From a Symbol to a Chord You Can Play
The order below works for any chart, printed or on screen. Take the steps one at a time for your first few chords; after that they fold into a single habit.
- Start with the exact chord name you need. Decide which chord you are looking for before you open the chart: C, G, Am, F#m, Cmaj7, and so on. Match the whole name, because an entry for C7 is not an entry for Cmaj7, and the suffix changes both the shape and the sound. If your chart is organized by key, find the key you are playing in and pick the chord the song actually lands on at that moment, not the first one in the row. Done when: you can say the chord name out loud and point to the entry that matches it exactly.
- If the chart in front of you is missing the shape you need, the free browser chord reference at GuitarTuner.io is an optional place to look it up without installing anything. It lists Major, Minor, 7th, Suspended, Power and Barre categories, with interactive diagrams, multiple voicings and audio playback for each chord, so you can check a shape and close the tab when you are done.
- Read the root note, then lock the fret position before you press anything. The letter at the top of an entry is the root note, and the numbers down the left side tell you which fret the picture starts on. If the top line is drawn thick, that line is the nut and the first square below it is fret 1. If the entry instead opens with a number such as 5, the top line is fret 5 and every dot sits relative to that. Count from the labeled fret, never from the top of the picture: the same shape at the nut and at fret 5 are different chords. Done when: you can name the starting fret and point to the fret each dot sits in.
- Translate each dot into a finger number. Every dot marks one string and one fret to press, and the number inside or beside it is the finger to use: 1 for the index, 2 for the middle, 3 for the ring, 4 for the little finger. Read the strings the way the diagram is drawn, low E on the left through high E on the right, so a dot on the second line from the left is the A string. For the open C shape, that reads as finger 3 on the A string at fret 3, finger 2 on the D string at fret 2, finger 1 on the B string at fret 1, the low E muted, and the G and high E strings left open. Done when: you can say in words which finger goes on which fret of which string before you touch the neck.
- Check the X and O marks before you strum. An O above a string means play it open, with nothing pressed. An X means do not play that string: leave it out of the strum or cover it with a free finger. A thick curved bar across several dots at the same fret is a barre, where one finger presses all of those strings at once. Reading these marks first stops you from strumming a chord that is one silent string short of the sound you expect. Done when: for every string you can say press, open or mute without looking twice.
- Play the shape string by string, then listen. Pluck one string at a time from the low E up, slowly and evenly, and listen for a clear ringing note. A thud means a finger is touching a string it should not touch; a buzz usually means a finger sits too far from the fret or you are pressing off-center. Fix one string, replay the ones you already checked, and only then strum the full chord. Done when: all six strings ring clearly in sequence, with no dead or buzzing notes.
- Put the chord to work in a progression. Strum the chord once, move to the next chord in the progression your chart groups with it, and change back. Go slowly enough that every shape arrives clean, and use the same two or three chords until the change feels automatic. Many charts print common progression rows under each key; play those in the order they appear rather than inventing your own sequence. Done when: you can change between the chords at a steady slow tempo and land every shape without hunting for a finger.
Chart Symbols at a Glance
The marks below appear in the same form across most chord charts, so once you can read one entry you can read the rest of the chart.
Mark on the chart | What it tells you | What to do |
|---|---|---|
Letter with a suffix, such as C, Am7 or F#m | The chord and its root note | Match the full name, suffix included, before you look for a shape |
Number beside the top fret | Where the diagram starts on the neck | Count every dot from that fret, not from the top line |
Thick top line | The nut, which is not a fret | Treat the first square below it as fret 1 |
Dot with a number | A string, a fret and the finger to use | Press that fret on that string with that finger |
O | An open string | Play it with no finger on it |
X | A muted string | Leave it out of the strum or mute it |
Curved bar across several strings | A barre | Press all the marked strings at that fret with one finger |
Common Misreads and How to Fix Them
Reading the top line as fret 1 when the shape starts higher. A diagram that begins at fret 5 is not a diagram of an open chord, and counting from the top line puts every finger a few frets off. The chord still sounds like a chord, which is what makes the mistake so easy to miss. Read the number at the left edge first, then place your fingers.
Treating a barre shape like an open shape. A barre asks one finger to hold several strings down, so the pressure comes from the finger's firm side with the thumb behind the neck, not from squeezing harder with every finger. Roll the barre finger slightly onto its side and move it closer to the fret if the sound is thin. If it still refuses, play the smaller version of the chord you already know and come back to the barre in a later practice session.
Muting the next string with a flat finger. Adjacent strings go quiet when a fingertip leans over onto a string that should ring open or be pressed elsewhere. Press with the tips of your fingers and keep them upright rather than flattened, then check the open and muted strings again. The X and O marks tell you which strings are supposed to stay silent, so use them as your checklist when something sounds wrong.
Quick Checklist
Run this list whenever a chord does not sound right:
- I matched the exact chord name, including the suffix.
- I found the starting fret and counted every dot from it.
- I assigned a finger number to each dot before pressing.
- I know which strings are pressed, open and muted.
- I plucked each string and heard a clean note from all six.
- I changed to the next chord in the progression without stopping.
When every line is true, the entry is finished. The chart has stopped being a picture to decode and become a set of instructions you can follow for any chord you meet.